
Last Updated: April 2026
Your cell phone is probably the best camera you own. It is always in your pocket, always charged, and always ready. Whether you are on a road trip through Spiti Valley, trekking to a high-altitude lake, or simply walking through a local market, your smartphone can capture photos that rival dedicated cameras. The trick is knowing how to use it well.
I have been clicking travel photos with my phone for over a decade now. From the barren landscapes of Ladakh to the green valleys of Tirthan, most of my favorite shots were taken on a smartphone. Over the years, I have picked up some simple habits that consistently produce better results. So, let me share 7 practical tips that will help you take amazing pictures using your cell phone, whether you are a complete beginner or someone looking to improve their travel photography game.
Let's quickly dive into the details:
What Makes Cell Phone Photography Different from a DSLR?
Cell phone photography has a few important differences from DSLR or mirrorless camera photography. Your phone has a smaller sensor, which means it captures less light and has a narrower dynamic range. However, modern smartphones in 2026 compensate for this with computational photography, AI-powered scene detection, and multi-lens setups that would have been unthinkable even 5 years ago.
The biggest advantage of your phone is convenience. You will never leave it behind, and it is always ready to shoot. The best camera is the one you have with you, and 9 times out of 10, that is your smartphone. Keep in mind that most professional photographers agree that composition and lighting matter far more than the equipment you are using. A well-composed phone photo will always beat a poorly framed DSLR shot.
How Do You Keep Your Subject in Focus?
There is nothing better than a picture where your subject is sharp and clear, no matter what your composition is. If your photograph is blurry, it goes straight into oblivion. So, the most important thing to do is to focus on your subject before you press the shutter button.
Here is a simple trick that most people overlook. Tap on your subject on the screen and hold for a second. This locks the focus (called AE/AF lock on iPhones and similar on Android). Once focus is locked, you can recompose your frame without the camera shifting focus to something else. This one technique alone will improve 80% of your photos instantly.
Try and decide whether you want a good depth of field, and then play with foreground and background. Always keep your subject in sharp focus. A lot of cell phones now allow you a fair amount of depth of field control through Portrait Mode, and even though those blurred backgrounds look great, you have to let your subject speak first. Focusing on the subject should be your prime emphasis, and ensuring the remainder (ideally 2/3 of your picture) is negative space helps highlight your key subject.
After taking the picture, there are a bunch of filters and editing tools available on your phone that can help define the picture better. Personally, I like to play around with the contrast and the sharpness of the picture. But there is a tonne of things you can do. Spend some time learning the editing features built into your phone’s gallery app before downloading third-party apps.
Why Should You Embrace Negative Space in Your Photos?
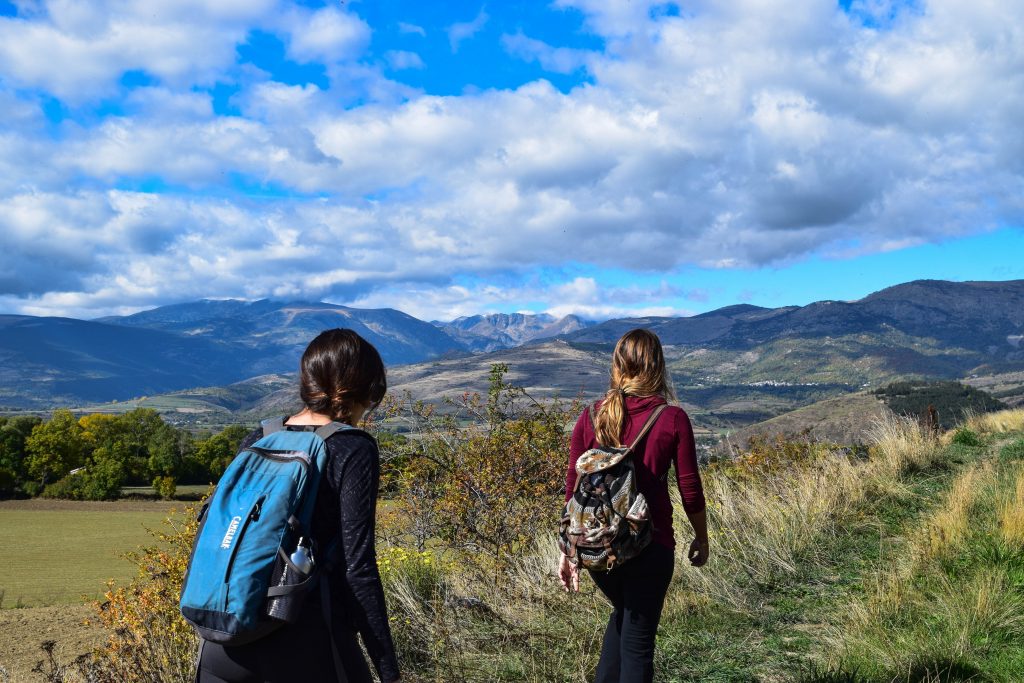
Negative space is simply the area around your main subject. It is the empty sky above a monastery, the vast desert floor around a lone biker, or the calm water of a lake surrounding a reflection. Most people try to fill the entire frame with “stuff,” but that actually makes photos cluttered and confusing.
When you leave generous negative space around your subject, it naturally draws the viewer’s eye to the focal point. Your photo becomes cleaner, more dramatic, and more professional looking. This is one of the easiest composition tricks to master, and it works brilliantly for travel photography where you often have wide open landscapes to work with.
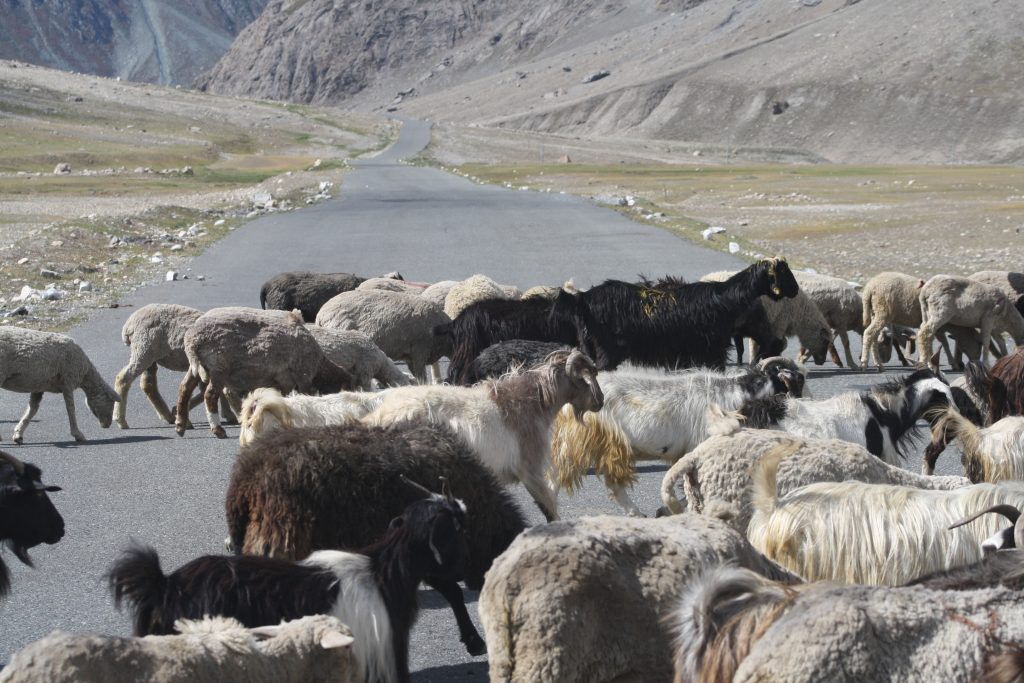
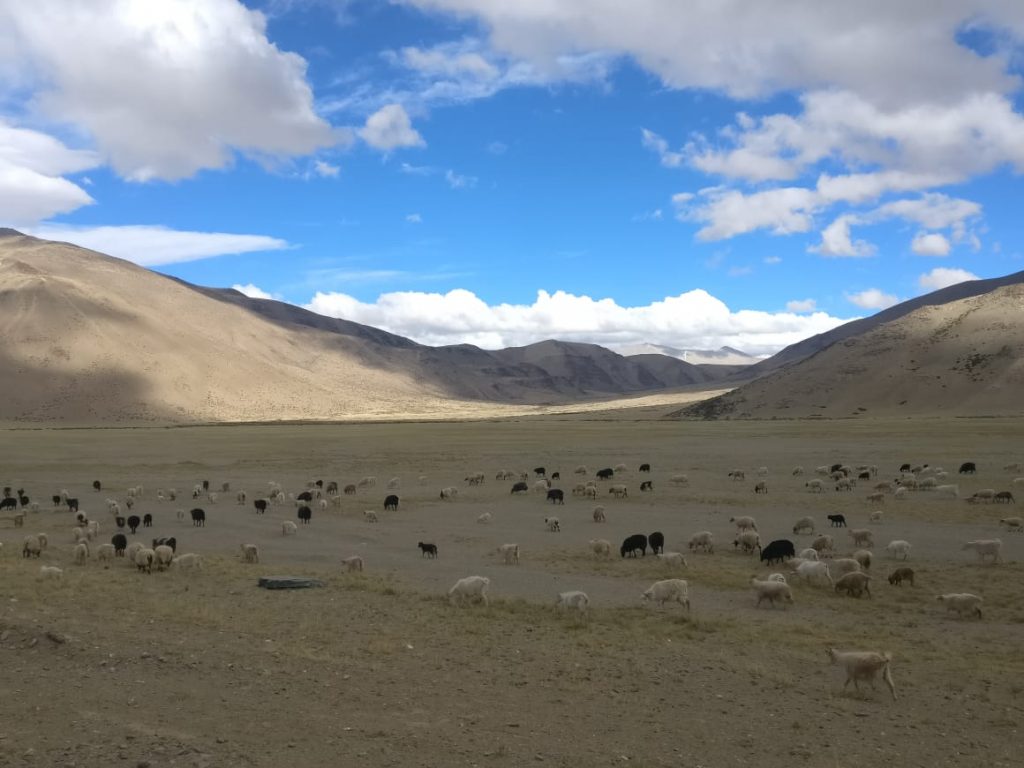
Good examples of negative space include large open skies, a big portion of cobalt blue sky, water bodies, large background walls, or the barren mountain terrain that you find across Ladakh and Spiti. Next time you are framing a shot, try pulling back a little instead of zooming in. Give your subject room to breathe.
Should You Always Shoot in Landscape Mode?
This is a tip that can be debated, but I strongly suggest shooting in landscape orientation (horizontal) for travel photos. When you click in portrait mode (vertical), you do not leave much space to crop later. Landscape orientation gives you more flexibility in post-processing and works better for most screens, whether it is a laptop, TV, or a photo frame.
Moreover, a wider frame gives you a clearer picture of the scene. A portrait shot restricts the viewer’s sense of space. One of the best ways to realize this is by clicking the same scene in both portrait and landscape and comparing them side by side. You will eventually come to realize that landscape is almost always a tad better for travel and nature photography.
However, there are exceptions. Vertical shots work well for Instagram Reels, YouTube Shorts, and tall subjects like waterfalls or narrow alleys. So, my suggestion is to shoot landscape by default and switch to portrait only when the subject demands it. If you are unsure, take both. Storage on modern phones is cheap, and having options during editing is always better than having regrets.
How Do Leading Lines Improve Your Cell Phone Photos?
Leading lines are one of the most powerful composition techniques in photography, and they work especially well with cell phones. Any natural or man-made formation that leads across the frame draws the viewer’s eyes inward and provides a natural sense of depth and direction. This trick gives the viewer an experience of discovering the photo gradually, almost like walking into the scene.


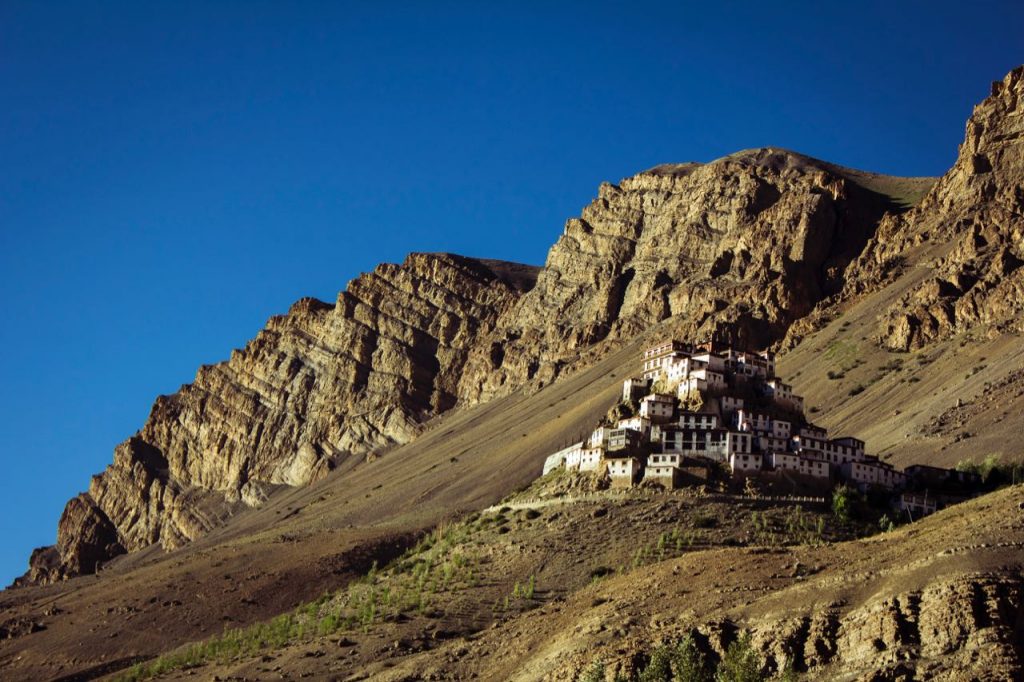
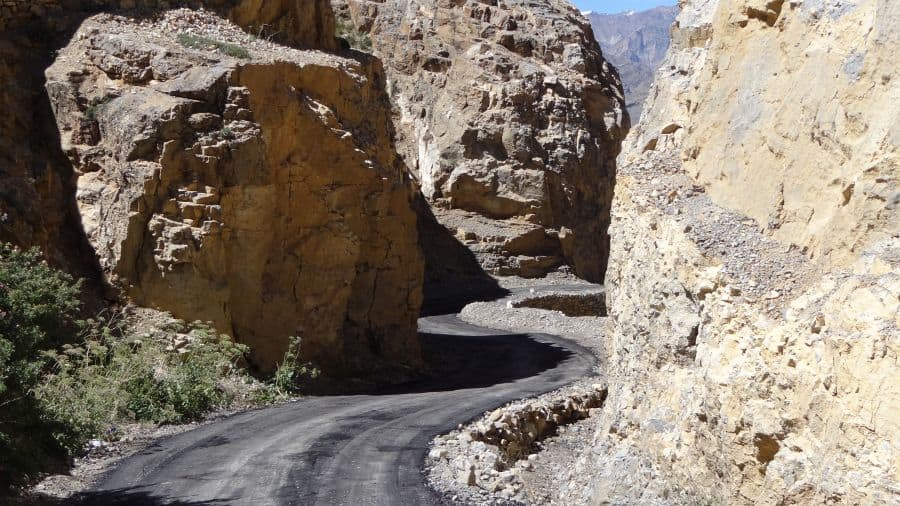
The Himalayas are full of natural leading lines. Think of the winding roads of Spiti, the straight highway stretches on the Manali to Leh route, a path through a pine forest, railway tracks, staircases of old monasteries, or even a river cutting through a valley. All of these can serve as powerful leading lines.
Here is a practical tip. When you spot a road or a path, position yourself so the line starts from one of the lower corners of your frame and leads toward your main subject or the vanishing point. This creates a diagonal that is naturally pleasing to the eye. The bonus is that it makes your photo look purposefully designed, even if you just stopped your car and clicked it from the roadside.
Why Should You Avoid Zooming on Your Phone?
Yes, the moon is hard to capture when you do not zoom, but zooming on a cell phone is mostly a futile exercise. Digital zoom (which is what most phones use beyond 2x or 3x) essentially crops the image and stretches the pixels, giving you a grainy, low-quality result. You do not want a grainy image to represent your photographic talents.
The best approach is simple. Click the photo at the default zoom level (1x) and crop it later during editing. This preserves the full resolution of the image, and you can crop precisely to the composition you want without any quality loss. Modern phones with 48MP, 50MP, or even 200MP sensors give you plenty of resolution to crop aggressively and still have a sharp image.
If your phone has an optical zoom lens (2x or 3x telephoto), that is different. Optical zoom uses a separate physical lens and does not degrade image quality. So, feel free to use the optical zoom options your phone offers. Just avoid the digital zoom that kicks in beyond those optical limits. You can usually tell the difference because the image preview will visibly lose sharpness once you cross the optical zoom threshold.
How Does the Grid (Rule of Thirds) Help You Compose Better Shots?
There is a fundamental principle in photography called the Rule of Thirds, and using gridlines on your phone is the easiest way to apply it. The rule says that your photo should be divided into three equal parts, both horizontally and vertically, creating a 3×3 grid with 9 sections. The most visually interesting compositions place the subject along these grid lines or at the intersections.
To enable gridlines, go to your camera settings. On iPhone, it is under Settings > Camera > Grid. On most Android phones, open the Camera app, tap Settings (gear icon), and look for “Grid lines” or “Composition aids.” Once enabled, you will see faint lines overlaid on your viewfinder.
This allows you to balance the photograph and compose mindfully. For example, when shooting a landscape, place the horizon along the top or bottom grid line instead of dead center. When shooting a person, place their eyes along the upper grid line. You can do away with the gridlines once you are used to composing. It is the easiest way to train yourself in taking balanced shots and gives the viewer a more natural, pleasing experience.
Keep in mind that the Rule of Thirds is a guideline, not a law. Sometimes centering your subject works perfectly, especially for symmetrical subjects like a monastery or a reflection in a lake. But for most travel photos, the rule of thirds will give you consistently better results than centering everything.
Why Is Natural Light the Secret to Better Phone Photos?
Light is the single most important factor in photography, and this is especially true for cell phones. Phone cameras have smaller sensors than DSLRs, which means they struggle more in low light. Your best bet is to always shoot in natural light whenever possible.
Try to avoid using the camera flash at all costs. Phone flashes are harsh, create unflattering shadows, and wash out colors. Instead, position your subject near a window, under open sky, or in a well-lit area. Even at night, look for ambient light sources like street lamps, bonfire light, or restaurant lighting before reaching for that flash button.
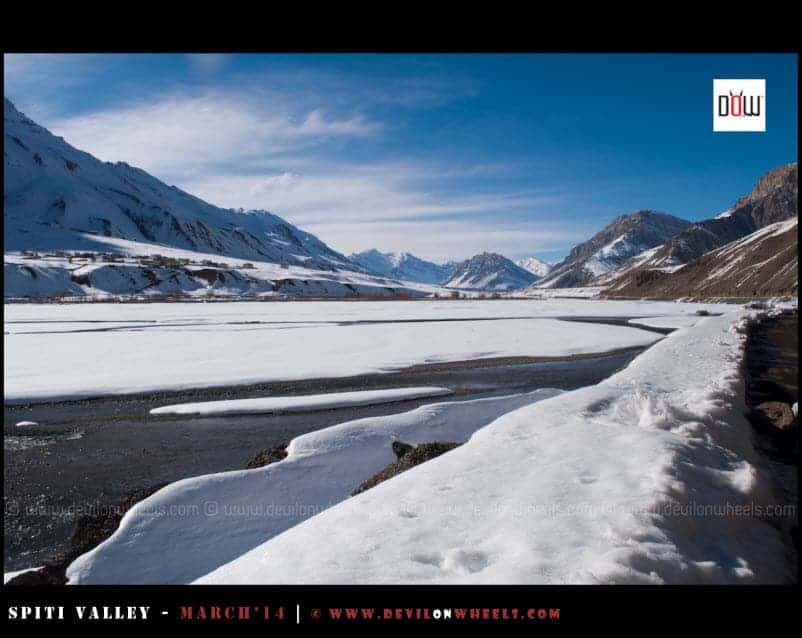
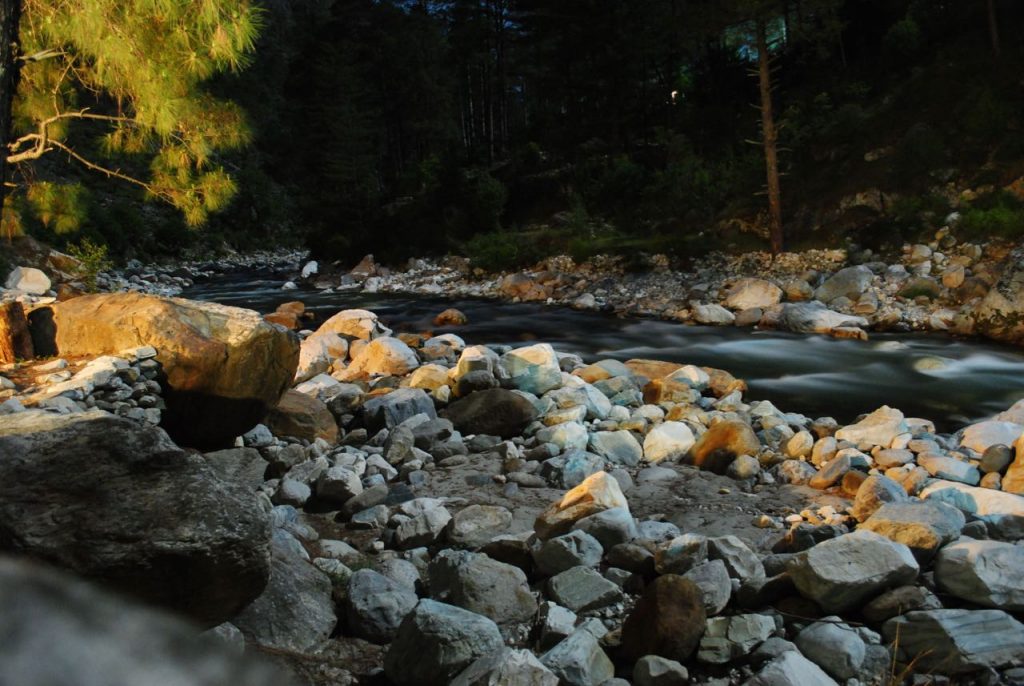
For travel photography in the Himalayas, the best light happens during the “golden hour,” which is roughly 30 minutes before and after sunrise or sunset. During this time, the sunlight is soft, warm, and directional. It turns ordinary mountain scenes into extraordinary photographs. I have personally shot some of my best photos from Tirthan Valley and Spiti during these golden hour windows.
If you must shoot in low light, modern smartphones in 2026 come equipped with excellent Night Mode. Night Mode uses longer exposures and computational photography to brighten and sharpen the image. Just keep your hand steady (or better yet, rest your phone on a stable surface) and let the phone do its magic. The results are genuinely impressive on flagship and even mid-range phones today.
What Are Some Bonus Tips for Better Cell Phone Photography in 2026?
Beyond the 7 core tips above, here are some additional techniques that have helped me over the years. These are small habits that collectively make a big difference in your photo quality.
Clean Your Lens Before Every Shot
This sounds basic, but you would be surprised how many blurry or hazy photos are caused by a dirty lens. Your phone lives in your pocket, your bag, or your hand all day. Fingerprints, dust, and moisture accumulate on the lens constantly. A quick wipe with a soft cloth (or even your shirt in a pinch) before clicking can dramatically improve clarity. Make this a habit, especially in dusty environments like Ladakh or on rainy treks.
Use HDR Mode for High-Contrast Scenes
HDR (High Dynamic Range) is a feature available on every modern smartphone. It takes multiple exposures and combines them to balance bright and dark areas in a single photo. This is particularly useful in mountain photography where you often have a bright sky and a dark foreground. Turn HDR on when shooting landscapes, temples against bright skies, or any scene with extreme contrast. Most phones in 2026 handle HDR automatically, but you can also toggle it on manually for consistent results.
Use the Timer or Volume Button for Stability
One of the biggest causes of blurry photos is camera shake from pressing the shutter button. Two easy solutions: use the 3-second timer so the phone stabilizes after you press the button, or use the volume button (up or down) as the shutter trigger. The volume button gives you a more natural grip, similar to holding a point-and-shoot camera, and reduces shake significantly. If you have wired earbuds, the volume button on the earbuds can also act as a remote shutter.
Shoot in RAW for Maximum Editing Flexibility
If your phone supports RAW photography (most flagship phones do through Pro Mode or third-party apps like Lightroom Mobile), consider shooting in RAW format for important shots. RAW files preserve all the image data captured by the sensor, giving you much more flexibility to adjust exposure, white balance, and colors in post-processing without degrading quality. The files are larger, so you do not need to shoot everything in RAW. But for that stunning sunset at Pangong Lake or the first light hitting Kinner Kailash, RAW mode is worth the extra storage.
Explore Panorama and Ultra-Wide Modes
Panorama mode is perfect for capturing wide mountain ranges, long valley vistas, or expansive desert landscapes that simply do not fit in a single frame. Move your phone slowly and steadily in one direction, and the phone stitches multiple frames together. For a quick tip, you can also flip your phone sideways and use panorama vertically to capture tall subjects like waterfalls, temples, or towering deodar trees. If your phone has an ultra-wide lens (most phones released after 2022 do), try switching to it for architecture and landscape shots. It captures a much wider field of view without the distortion of panorama stitching.
![What is the best bike or best motorcycle for Leh Ladakh bike trip? [4 Things to Consider]](https://discoverwithdheeraj.com/yt_vid_thumbs/ladakh/81.png)
Which Free Apps Can Help You Edit Travel Photos on Your Phone?
You do not need expensive software to edit your travel photos. There are excellent free apps available for both Android and iPhone that can take your cell phone photos from good to great. Here are a few that I recommend for travel photography.
Google Photos comes pre-installed on most Android phones and is free on iPhone too. Its auto-enhance feature is surprisingly good. It also offers manual controls for brightness, contrast, warmth, and saturation. For quick edits on the go, this is all most people need.
Snapseed (by Google) is a more advanced free editor. It has features like selective adjustments (brighten just the sky or just the foreground), healing brush (remove unwanted objects), and perspective correction. It is my go-to for fine-tuning travel photos.
Lightroom Mobile (free version) offers professional-grade editing tools including RAW file support, preset filters, and precise color controls. If you want to develop a consistent editing style across your travel photos, Lightroom is the way to go.
The key with editing is to keep it subtle. Slightly boosting contrast, sharpness, and vibrance can make a flat phone photo pop. But going overboard with saturation or HDR filters will make your photos look artificial. The goal is to enhance what was already there, not to create something that did not exist.
What Quick Phone Settings Should You Change Right Now?
Before you head out on your next trip, make these quick changes to your phone camera settings. These take 2 minutes and will improve every photo you take going forward.
Enable Grid Lines: Settings > Camera > Grid (iPhone) or Camera Settings > Grid Lines (Android). This helps you apply the Rule of Thirds effortlessly.
Set Highest Resolution: Some phones default to a lower resolution to save storage. Go to Camera Settings > Photo Resolution and set it to the maximum available (48MP, 50MP, etc.). Storage is cheap. Quality is not.
Turn Off Digital Zoom Shortcuts: If your phone has a zoom slider, train yourself to resist using it beyond the optical limit. Know your phone’s optical zoom range (usually marked as 1x, 2x, 3x on the viewfinder).
Enable Location Tags: This is a travel-specific tip. Enable geotagging in your camera settings so every photo gets tagged with GPS coordinates. When you are sorting through 500 photos after a 10-day Ladakh trip, location tags will be a lifesaver.
Familiarize Yourself with Pro/Manual Mode: Spend 10 minutes playing with ISO, white balance, and shutter speed in Pro Mode. You do not need to use it for every shot, but knowing it exists gives you options in tricky lighting situations.
Final Thoughts
Without getting into too many technicalities, these are some of the best tips and tricks for taking amazing pictures with your cell phone. The beauty of phone photography is that the best way to improve is simply to practice. Take more photos. Experiment with angles, light, and composition. Delete the bad ones and study the good ones.
Your style is yours alone, and you get to experiment as you please. The headroom (space above your subject) and legroom (space below your subject) are completely up to your sensibilities. The basic hygiene factors covered in this guide will ensure you are sorted for enjoying your memories at a later date.
If you found this guide helpful, feel free to share it with your friends and family who love taking photos on their travels. For more photography-focused content, you can check out our Ladakh Photography Guide which covers the best locations, camera settings, and timing by season. And for practical travel tips, check out these useful articles:
- Must-Have Things to Carry on a Hiking or Trekking Trip
- Tips for Responsible Travel in the Himalayas
- Ultimate Guide to Pack for Long-Distance Motorcycle Riding
- Mobile Phone Connectivity in Leh Ladakh
- Best Trekking Shoes Under Rs 5000
For other details, discussions, queries, and finding travel partners, please go through the DwD Community. I will be happy to hear from you. Happy clicking 🙂 …
Frequently Asked Questions
Which phone is best for travel photography in 2026?
Any flagship or upper mid-range phone from Samsung, Apple, Google, or OnePlus will deliver excellent travel photos. The Samsung Galaxy S25 Ultra, iPhone 16 Pro, Google Pixel 9 Pro, and OnePlus 13 are all strong choices. However, the tips in this article will help you take better photos regardless of which phone you use. Composition and lighting matter far more than the phone model.
Can a phone camera replace a DSLR for travel?
For 90% of travel photography, yes. Modern smartphone cameras handle landscapes, portraits, street photography, and even low-light situations remarkably well. Where DSLRs still have an edge is in wildlife photography (long telephoto reach), very low light, and professional commercial work. For sharing on social media, printing up to A3 size, or keeping personal travel memories, a phone camera is more than sufficient.
How do I take good photos in low light with a phone?
Use Night Mode (available on most phones made after 2020). Keep your hands steady or rest your phone on a stable surface. Avoid using the flash. Look for ambient light sources like streetlights, bonfires, or window light. If your phone supports Pro Mode, lower the shutter speed and keep ISO below 800 to reduce grain. Editing brightness and shadows in post-processing also helps recover details in dark areas.
What is the best time of day for phone photography outdoors?
The golden hour, which is approximately 30 minutes before and after sunrise or sunset, provides the most flattering natural light. The light is soft, warm, and directional, creating natural shadows and depth. The blue hour (just before sunrise or after sunset) gives beautiful cool tones. Midday sun creates harsh shadows and overexposed highlights, so it is the most challenging time to shoot.
How do I take better landscape photos with a phone?
Enable grid lines and use the Rule of Thirds. Shoot in landscape (horizontal) orientation. Look for leading lines like roads, rivers, or paths. Include a foreground element (a rock, a flower, a person) to add depth. Use HDR mode for high-contrast scenes. Shoot during golden hour for the best light. And most importantly, do not zoom. Click at 1x and crop later if needed.
Should I edit my travel photos or keep them original?
A little editing goes a long way. Subtle adjustments to contrast, sharpness, and vibrance can transform a flat phone photo into something that truly captures the moment. The key is moderation. Avoid cranking up saturation or applying heavy filters. Apps like Snapseed and Google Photos make it easy to make quick, tasteful edits right on your phone. Think of editing as the final 10% that completes the photo.
How do I keep my phone camera safe during Himalayan treks?
Carry a ziplock bag to protect your phone from rain, dust, and river crossings. Clean the lens frequently with a soft cloth, especially in dusty regions like Ladakh. Use a lanyard or phone grip to prevent drops on rocky terrain. Keep a portable power bank charged since cold temperatures drain batteries faster at high altitudes. If your phone is not water-resistant, consider a waterproof pouch for monsoon treks and water crossings.